
Approving leave requests
Review what your team has asked for, check it against the schedule, and approve or decline.
When someone books time off it arrives as a pending request and waits for a decision. Reviewing is a short pass: read the dates, check your cover, and approve or reject — Atteny tells the person either way.
- 1
Open the queue
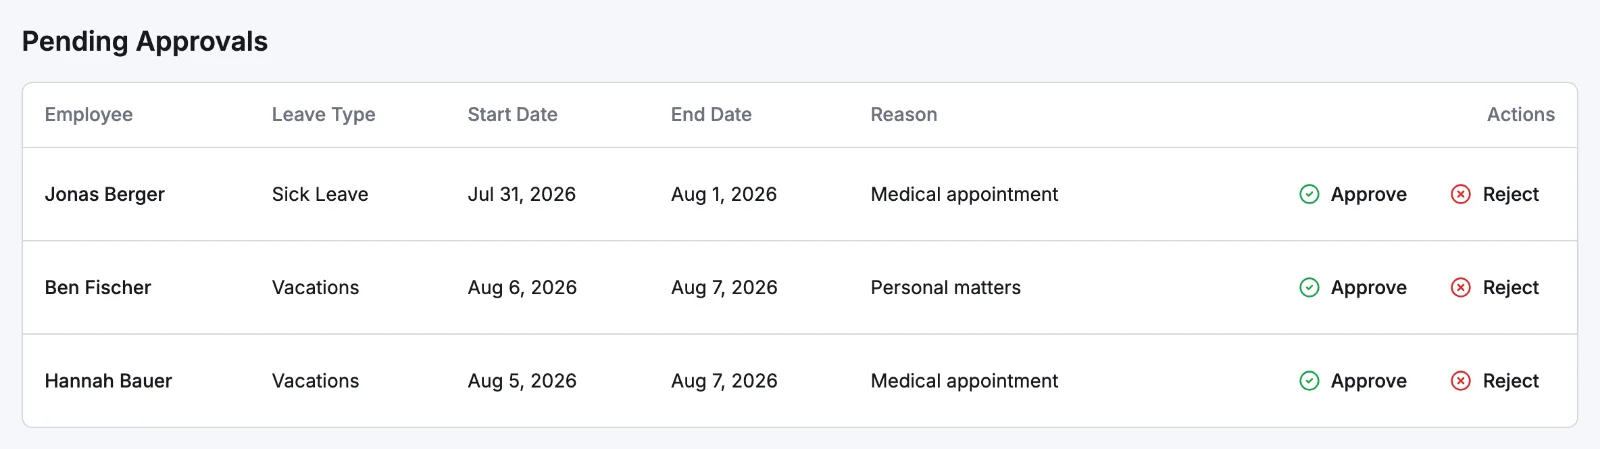
Go to Schedules → Leave Requests. Pending Approvals sits above My Requests and only appears while something is waiting.
- 2
Read the row
Each row shows the Employee, the Leave Type they picked, Start Date, End Date and the Reason they typed. A long reason is shortened — hover it to read the whole thing.
- 3
Check the week yourself
The row doesn't flag a clash with the schedule, so if cover is tight open Schedules for those dates before you decide. Administrators also get an Employee Balances table further up the page, showing remaining days per leave type.
- 4
Approve, or reject with a reason
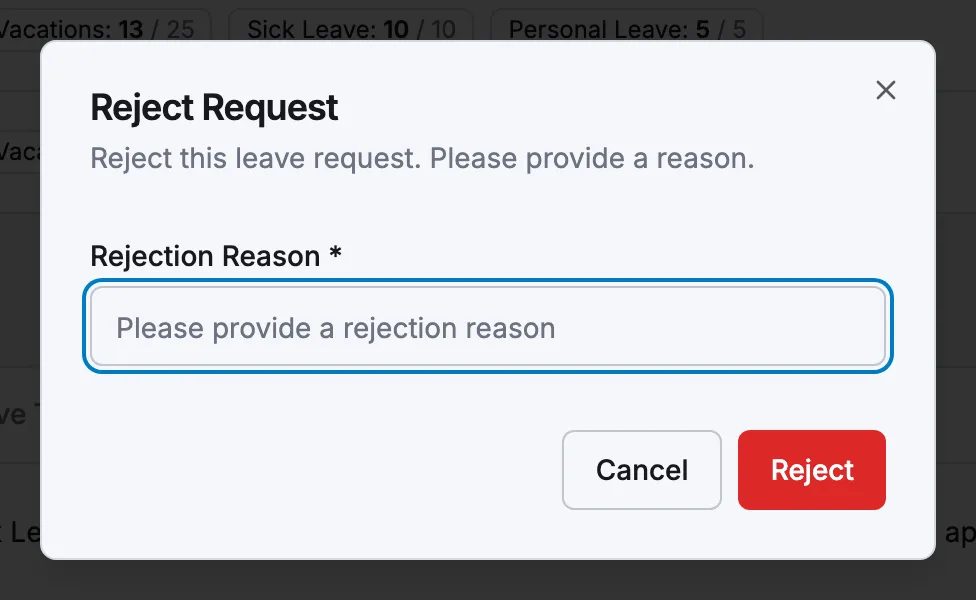
Approve opens Approve Request, where Notes (Optional) are kept on the request but not sent on. Reject opens Reject Request, where a Rejection Reason is required — that one does reach the employee.
What approving changes
- The days count against that person's balance for that leave type and year — see Leave balances.
- Nothing is written onto the schedule. No shift is created or cancelled, and a shift already sitting on those days stays put — remove or reassign it yourself in Building the week.
- Auto-schedule does skip anyone on approved leave, so rebuilding a week after approval keeps those days free.
- The requester is notified in the app, by push and by email — the mix follows Settings → Notifications. An approval names the leave type and the dates; a rejection carries your reason.
Related articles
Still need help?
Contact support