
Building the week
Create, move and fill shifts on the schedule grid.
Schedules shows one week at a time: a row per person, a column per day. You build the week by dropping shifts into that grid.
- 1
Pick the week
Use the arrows either side of the date range to move between weeks. Narrow the grid to one site with the All Locations switcher in the top bar.
- 2
Add a shift
Select empty space in someone's day cell, or use Add Schedule in the top-right. You can also drag a card out of the Employee Pool above the grid onto a day. The pool holds everyone who still has a free day this week, and can be sorted by name, hours remaining or fewest shifts.

- 3
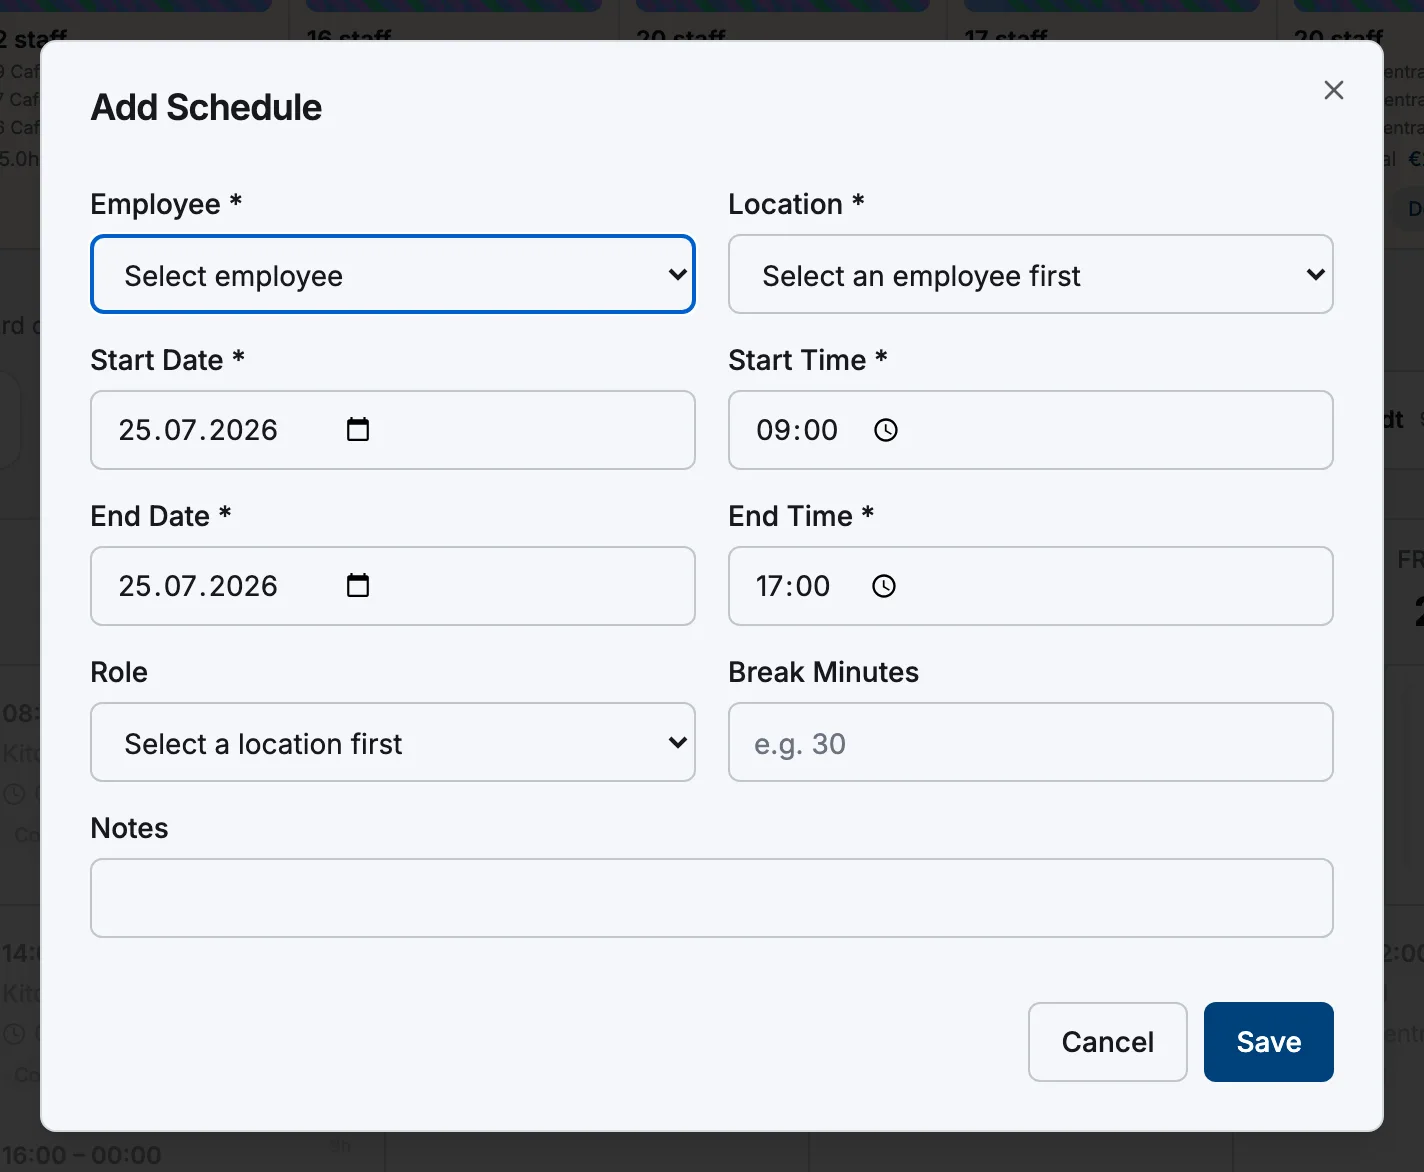
Fill in the details
Choose the Employee first. The Location list then narrows to the sites they're assigned to. Set the dates and times, and optionally a Role (the areas defined on that location), Break Minutes and Notes. Breaks only unlock on shifts of six hours or more.
- 4
Read the warnings before you save
The dialog flags the person's declared availability, shows Already has a shift with the clashing times, and lists their monthly hours against any cap. Overlapping shifts are refused on save; a non-overlapping second shift on the same day is fine, so split shifts are just two cards in one cell.
- 5
Move, edit or delete
Drag a card by its grip handle to another day or another person. The times come along unchanged. Select a card to reopen it, where editing also exposes Status (Scheduled, Confirmed, Cancelled, Completed), or Delete to remove it. The employee is notified on every create, change and cancellation.
Reading the grid
Each card is tinted in that person's colour and shows the times, role, location, length in hours and, once it isn't simply Scheduled, a status badge. Past shifts are greyed out and locked. The Coverage strip above the grid counts staff and hours per day, with a colour bar per location; for admins its cost figure is a reference estimate from scheduled hours, not official pay.
Related articles
Still need help?
Contact support