
Reviewing team availability
See who can work when, and handle availability that needs your approval.
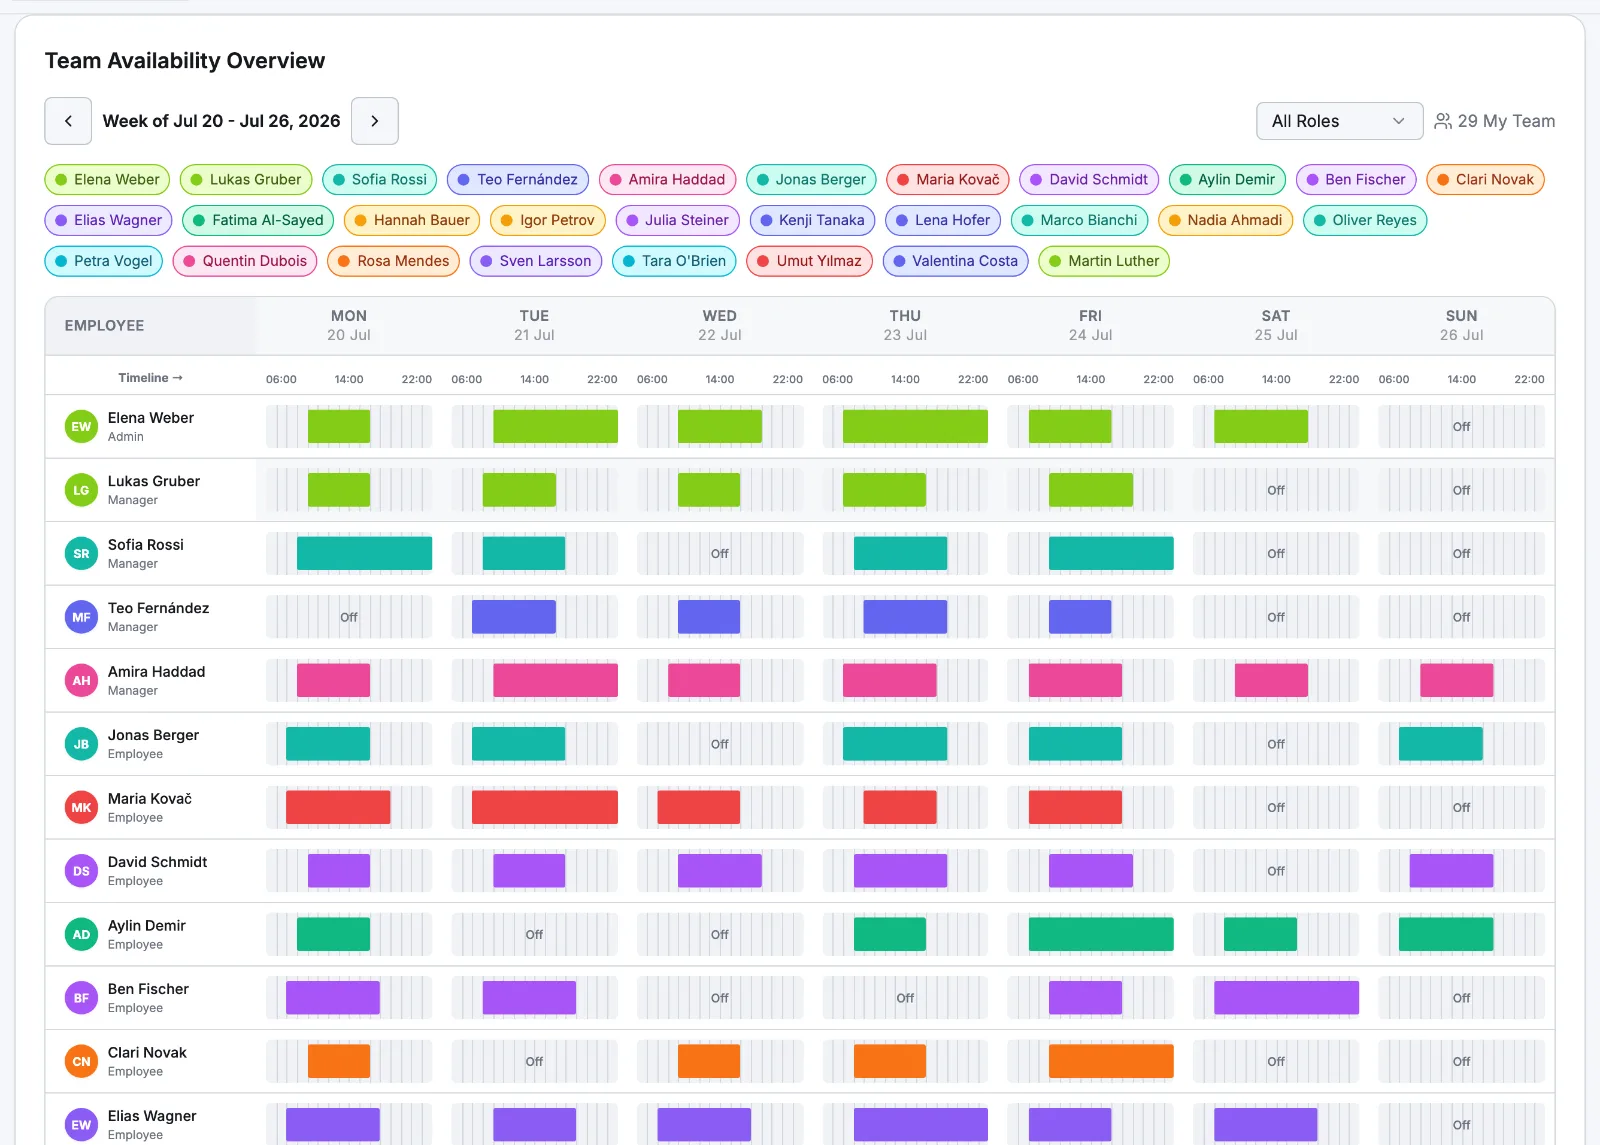
Schedules → Availability opens on Team Availability Overview: one row per person for the week you're viewing, so you can see who can work before you build the rota.
Reading the overview
Each row draws that person's declared hours as coloured bars on a 06:00–22:00 timeline, one cell per day. A day reads Off when they marked themselves unavailable and Not set when they haven't submitted anything for that week. Hover or tap a bar for the exact times. Use the arrows to change week, and the role filter (All Roles, Admins, Managers, Employees) to narrow the list.
The Coverage row along the bottom counts staff available per hour and shades each hour by how much of the shown team that is — light below 33 %, mid 33–65 %, dark 66 % and up. Select a name to jump into editing that person's week.
Approving change requests
Employees can edit a week freely while it's still far enough out. Inside the notice window their edit arrives as a change request instead, and the week keeps its existing hours until you decide.
- 1
Open the queue
Pending Availability Approvals sits at the top of the Team Availability Overview tab with a count. The dashboard Action Center also has an Availability tab that links here.
- 2
Check what changed
Each row shows the week, any note the employee added, and a per-day before → after diff listing only the days they actually changed.
- 3
Approve or reject
Select Approve (notes optional) or Reject (notes required). Approving makes the requested version their active availability; rejecting leaves the previous one in place. Either way, the outcome and your notes appear on the employee's own Availability page.
How it feeds scheduling
Availability guides scheduling rather than blocking it. The Add Schedule dialog shows the person's declared hours for that day, or warns you when they're unavailable or haven't submitted — you can still schedule them. See Building the week. Auto-schedule is stricter: it skips anyone marked unavailable, or whose declared window doesn't cover the slot, and favours the people it fits best.
Related articles
Still need help?
Contact support