
GPS location checks
Optional proof that a clock-in happened on site: what is captured, what a failed check does, and how admins turn it on.
A GPS check is optional extra security you can add to a location: a point on the map plus a radius in metres. When it's set up, Atteny compares where the phone is at the moment someone clocks in or out with that circle. Locations without coordinates have no GPS check at all: clocking in works exactly as before.
What is captured
The app reads the phone's position once, at the instant you tap clock in or clock out. Atteny then stores only the result (passed or not passed) on that time entry. Your coordinates are not saved, and there is no background or continuous tracking: nothing is read while your shift runs, and nothing is read when the app is closed.
If the check doesn't pass
Clocking in is stopped and the app tells you how far away you are. Move closer and try again. After two failed attempts, the app offers Request Manager Approval: add a note explaining what happened and select Submit for Verification. Your shift starts, marked for your manager to review.
Clocking out is never blocked: your entry is saved and flagged for review instead, so you never get stuck on shift.
If Atteny can't read your position at all, allow the location permission when your phone asks, then try again.
Managers and admins see anything that failed the check in the pending verifications list on Timesheets, together with the employee's note, and approve or correct it there. See Review flagged entries.
Set it up (admins)
- 1
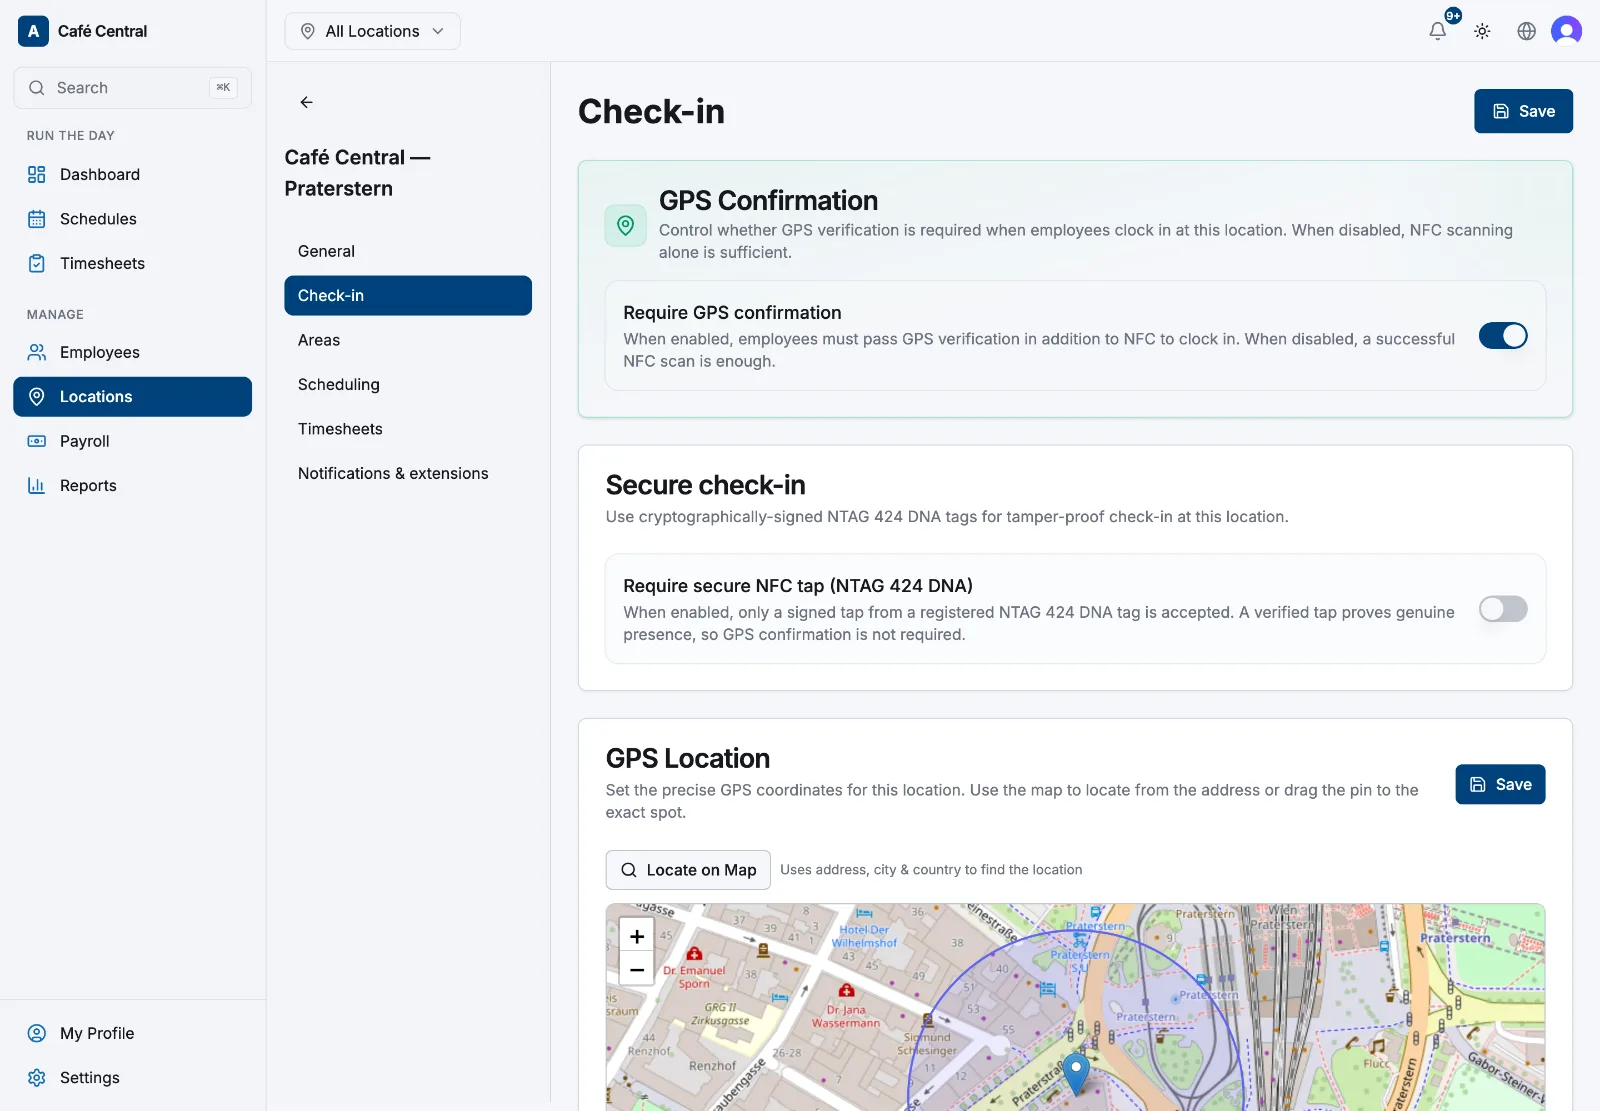
Open the location's Clock-in tab
Go to Locations, open the location, then select Clock-in.
- 2
Place the pin and set the radius
In GPS Location, drag the pin on the map to the exact spot: Latitude and Longitude are filled in for you. Enter a Geofence Radius (meters) that comfortably covers the building, then select Save on that card.
- 3
Choose whether it's required
Once coordinates exist, a GPS Confirmation card appears. Turn Require GPS confirmation off if a successful NFC scan alone is enough at this site, then select Save at the top of the page.
Related articles
Still need help?
Contact support