
Add your first location
Create the place your team works so they can clock in, and pin it on a map for GPS clock-in.
A location is a place your team works: a café, a shop floor, a second branch. It's the anchor for a lot of Atteny: it's where people clock in, it powers NFC and GPS clock-in, and each location carries its own scheduling, break and timesheet rules. Add at least one before you invite your team.
- 1
Open Locations
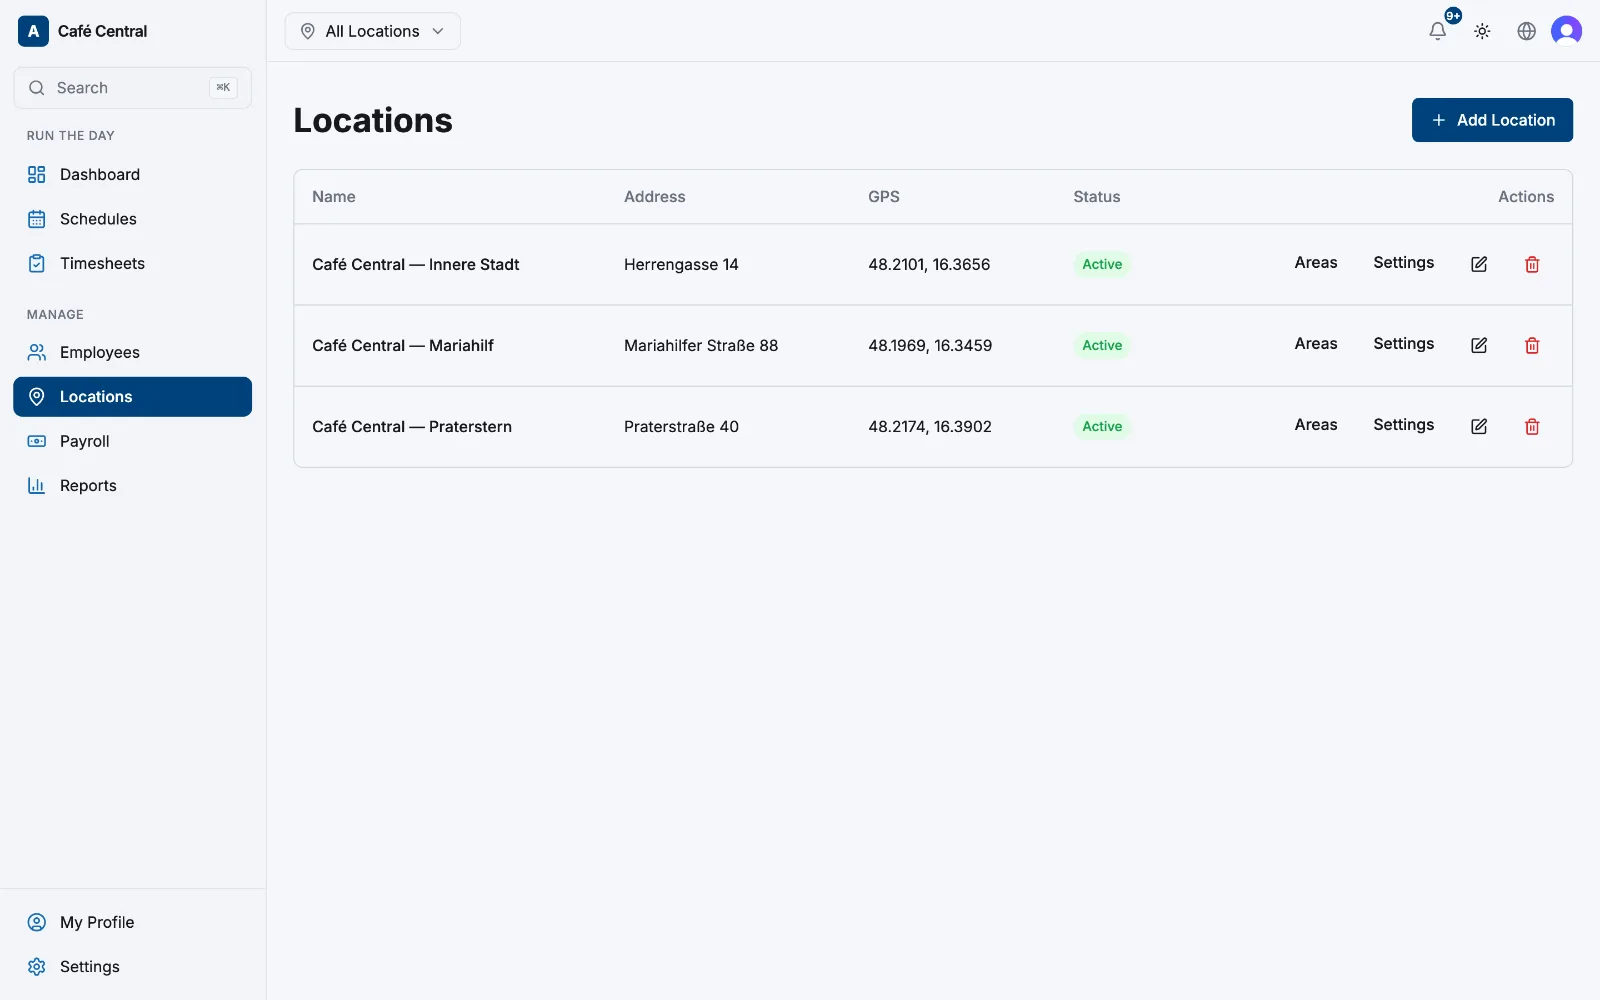
Select Locations in the sidebar. This is where every site you run lives, each with its own settings.
- 2
Select Add Location
Select Add Location in the top-right corner. On the Starter plan, once you already have a location this button is greyed out with a Pro badge. That's the single-location limit.
- 3
Name it and add the address
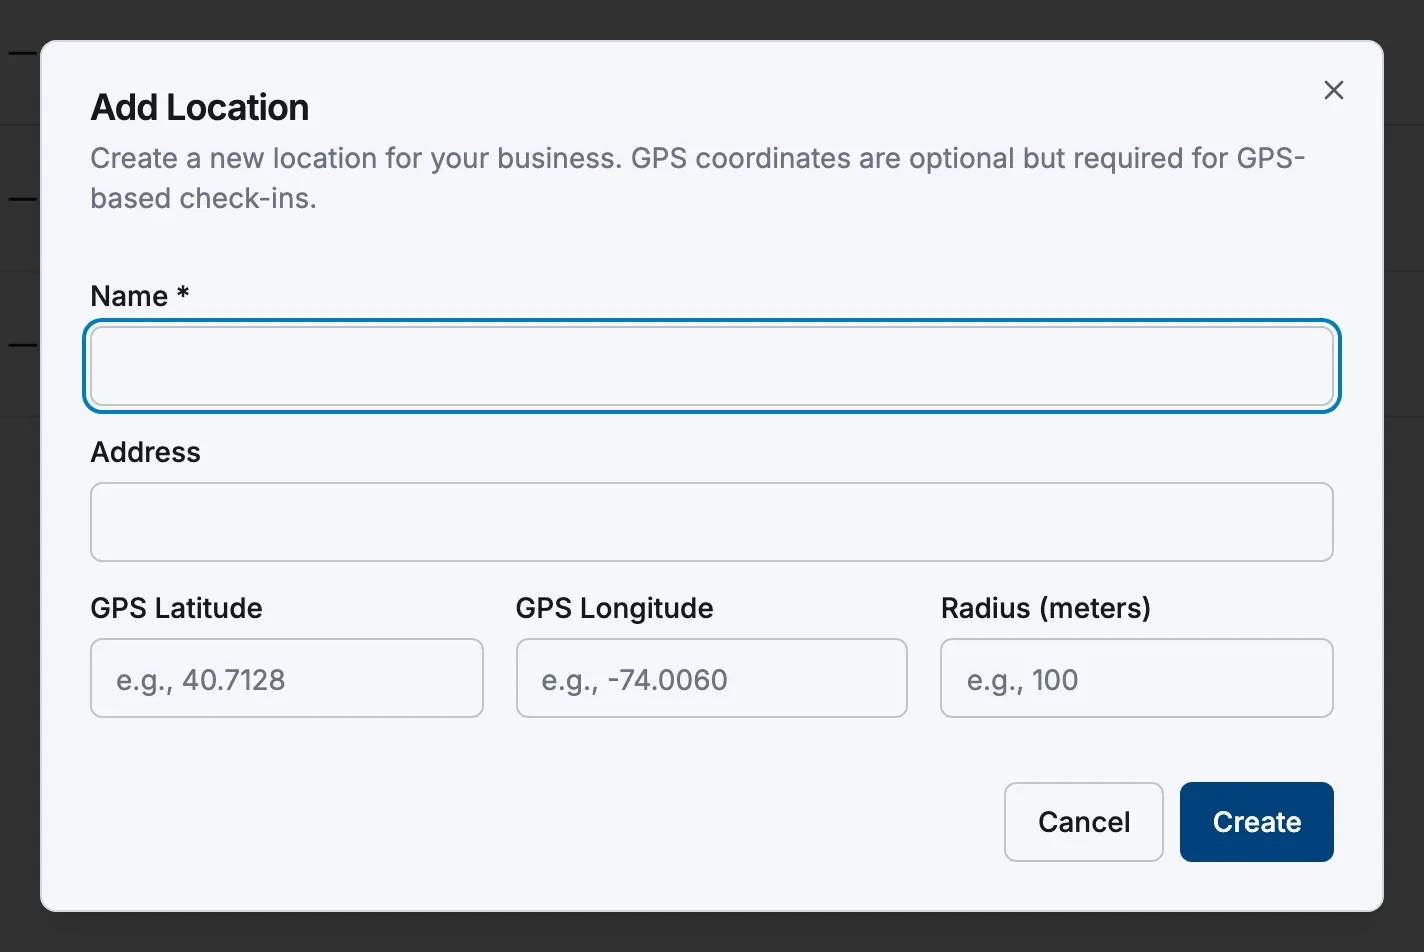
In the dialog, type a Name (required) your team will recognise, like "Main Café". Add the Address (optional). You can leave the GPS fields blank for now. It's easier to pin the exact spot on a map in the next step. Select Create.
- 4
Pin it on the map for clock-in
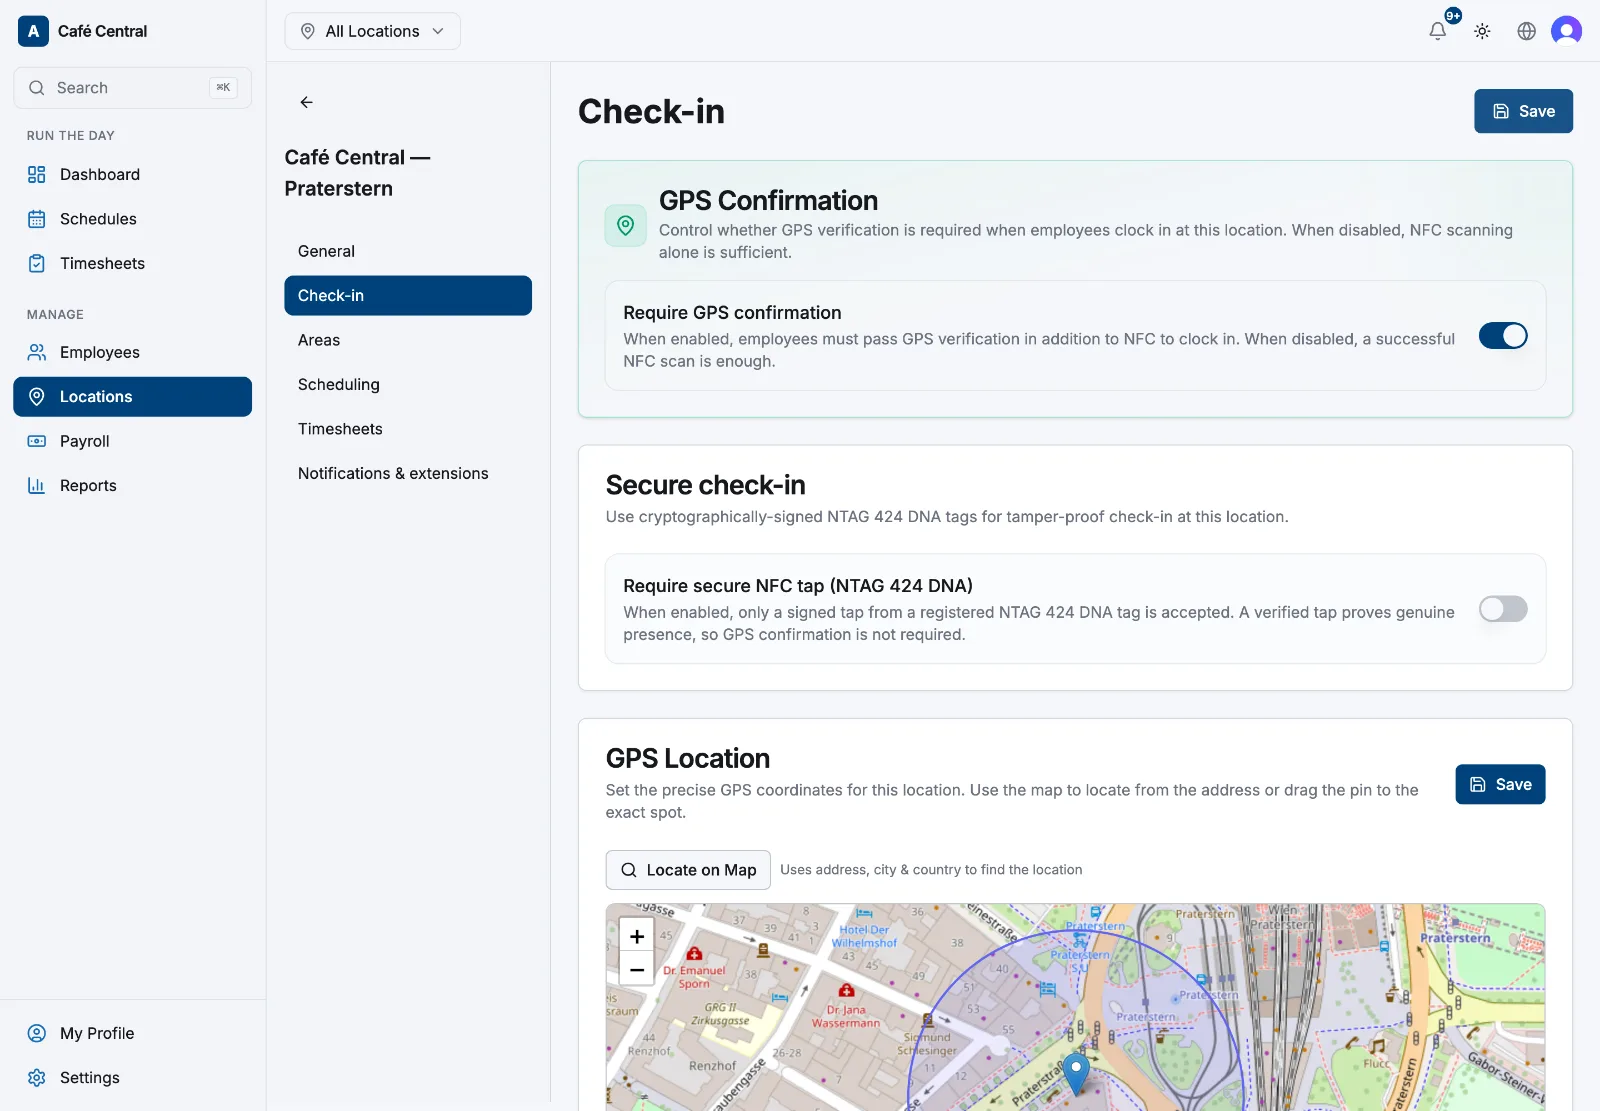
Back on the Locations list, select Settings next to your new location, then open the Clock-in tab. In the GPS Location card, select Locate on Map to drop a pin from the address, then click the map or drag the pin to the exact spot. Set a Geofence Radius (meters): how close someone must be to clock in. Then select Save.
What a location controls
Everything about a location lives across the tabs on its Settings page:
- General: name, address, city and postal code.
- Clock-in: the GPS pin and geofence, plus NFC tag setup for tap-to-clock-in.
- Areas: sections within the site (kitchen, floor, till) for scheduling.
- Scheduling: operating hours, default shift and break lengths.
- Timesheets: break rules and what managers may do at this location.
Which people work at a location is set on each person's profile, on their Employment tab, so an employee can belong to more than one site.
What's next
Now that you have somewhere for people to work, set up who does what and what they're paid in Roles and pay rates, then put people on shifts in Your first schedule.
Related articles
Still need help?
Contact support